This guide was written by @MadKing
Argagarg is a highly adaptive character that wants to force his opponents into a painful endgame. He can either do this by crashing with the violence of the waves, or by slowly grinding his opponents like the river erodes the stone. If you want a character who doesn’t seem threatening until the opponent has lost, then Argagarg is the character for you.
Pros
- An Ace with two different RPS options, including the best block in the game
- Innate provides a lot of free damage, which becomes even better in endgames
- Relatively fast attacking options (x.4 normals, 2.2 speed Q, 0.2 speed AA)
- Benefits from normal draw thanks to his relatively quick normals
- Functions effectively on a small hand
- Because of the unique nature of his Ace, can either play aggressively or defensively as the situation calls
- Access to a very strong counterspell
Cons
- Extremely weak throws, tied for the worst in Yomi (x.8 speed, 6 damage)
- Very susceptible to knockdown pressure
- Low damage output per combat win
- Low average card quality
- Does not benefit from a larger hand compared to most other characters
Card Breakdown

3 Combo Points gives Argagarg fairly low combat damage; he has the second-lowest maximum damage off an attack and the lowest off a throw. This is more than compensated by his innate, which gives him incredible amounts of free damage. A game that lasts at least ten turns without Argagarg being knocked down gives him 20 damage for free from Hex of Murkwood, which compares to hitting with many ace moves once. This becomes even stronger in the endgame: when life totals are lower, 2 free damage is a much larger percentage of an opponent’s life total. Any opponent at 10 HP is on a 5-turn clock and is under a lot of pressure to either kill or knock down Argagarg before their time runs out.
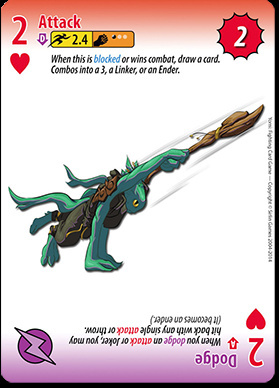
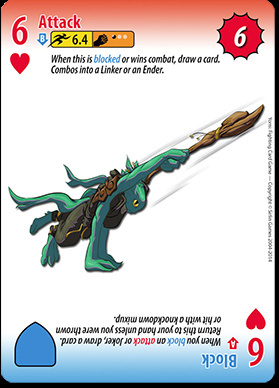
Argagarg’s 2 is among his best attacks. The 2.4 speed means it either beats or trades in Argagarg’s favor with most normals in the game (exceptions: Val Burst of Speed; Setsuki 2; Vendetta 2; Any Range BBB normal; Onimaru 5; Gwen 2; Zane 2; Any Zane Meaty Attack normal; Entangling Vines Rook 4), as well as trading with many special moves (including Geiger/Grave J). Combined with the card draw from the normal draw rule, this makes it both an excellent combo starter as well as a good defensive move when Argagarg is knocked down. In addition, this allows Argagarg to deny most characters the opportunity for a normal draw themselves since a trade does not allow either character to draw. In a pinch, the other end of this card can be used as a dodge. Extremely valuable card overall.
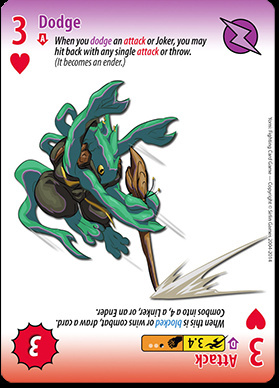
Mostly useful as a dodge, since 3.4 speed is not nearly as strong as 2.4 speed. Useful in combos from Argagarg’s 2, such as the very basic 2-3-4 to grab an ace. One of the better cards to use as power-up fodder for Aces.

Almost always used as a dodge or a combo ender. On an extremely hard normal throw read, this leads to Argagarg’s most damaging straight (4-5-6); however, this card’s utility as a dodge far outclasses the extra damage it gains over 2.
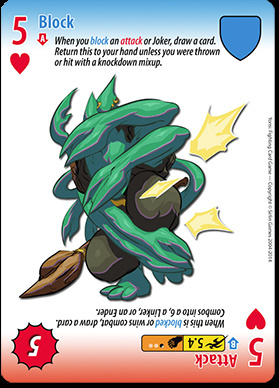
Argagarg’s best block besides A. This is also generally his best odd mixup normal since his 3.4 speed 3 does not outspeed most attacks used to counteract knockdown mixups. Notably, this is one of two normals that can win combat against Rook’s and Troq’s Ks. Acceptable combo ender off of throw, and also acceptable power-up fodder once the 5 becomes less necessary.
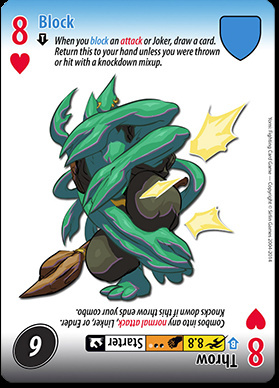
Argagarg’s best even block. On a hard read, this is also Argagarg’s most damaging normal combo starter (6 - K - J or 6 - AA), and this is also important against Rook’s and Troq’s K’s. Perfectly fine card to tack onto a throw as well. In general a bit dicey to power up with these until much later in the game, since you may be left knocked down without even blocks if you don’t have access to 6.
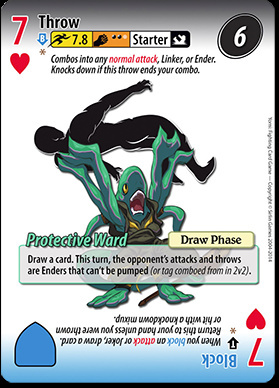
This is an incredibly important card for two reasons. The first is that this is Argagarg’s fastest throw. Even at the glacial speed of 7.8, this still keeps you from being absolutely dominated in throw wars by almost every 8-throw in the game. Against other x.8 throw characters, this becomes even more important as it allows for a throw clash against their 7s. Protective Ward is a lot more matchup-specific. Its most practical application is as a form of knockdown defense, since the opponent will not be able to combo after a mixup normal. More uses for Protective Ward will be covered later. Being forced to block with a 7 is depressing, so try not to if you have other blocks available. Powering up with 7s is almost always a mistake unless the situation is dire.
This card is almost always a throw UNLESS Argagarg is knocked down without access to a 6; at that point it becomes an even block.
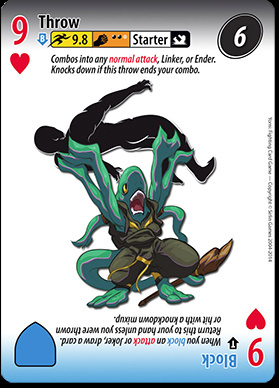
Argagarg’s second-best normal block when not knocked down. Also serviceable as a throw, especially if you want to conserve your 7s and 8s for later in the game. This is the only throw that should be considered for power-up fodder in the vast majority of matchups.
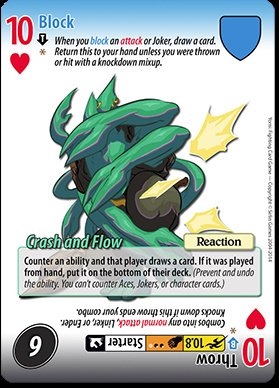
Argagarg’s worst combat card. This is more than made up for by being one of the strongest counterspells in the game, if not the absolute strongest. Putting a card on the bottom of a deck is effectively the same as discarding it (except against Lum), with the added benefit of preventing characters that can reuse their discard pile from attempting to bring the ability back. In general, the card that is drawn to replace the ability is well worth preventing the ability from happening. Against characters with bad ability options, this is Argagarg’s best even block and power-up fodder; against any character with strong abilities, this should never be used as a power-up.
An extremely versatile face card; this is either Argagarg’s best combo ender (7 damage for 1 combo point and one card), a poke that trades favorably with other 2.4 speed attacks, or a defensive card when Argagarg is knocked down.
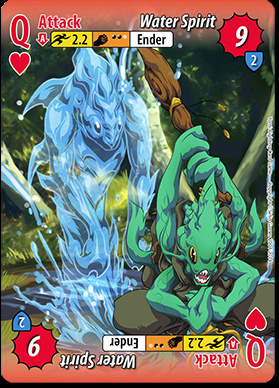
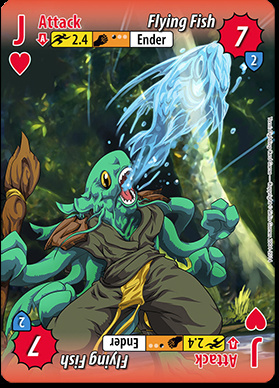
This is Argagarg’s fastest attack when he does not have access to aces; as a result, this becomes extremely valuable as a combat reveal. This is also Argagarg’s most card-efficient damage, as it does 11 damage including Hex for only one card. Comboing into this card is almost always a mistake unless it will bring the opponent to a critical life total. 2.2 speed beats several important cards cleanly (2.4 speed normal/special attacks being paramount here) and is also fairly safe to use to poke out opposing throw attempts. This also trades favorably with many 2.2 speed moves, as out-trading 11 damage at that speed is almost impossible.
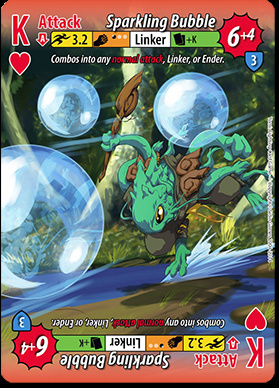
If you don’t want to risk a normal (perhaps it is your only block or dodge), this is your highest-damage starter at 6-10 damage for 1 combo point. As a 1 combo point linker, this enables solid damage off of your pokes as well as your throws; example combos include normal - K - J, 2 - K - normal, and throw - K. Usually, pumping the K is a mistake unless the damage is necessary. This is the only face card you should consider using for power-up fodder.
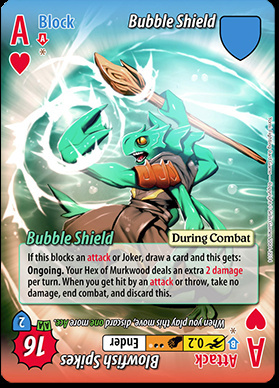
This is Argagarg’s most important card, and is in contention for being one of the best cards in Yomi. As one of the rare aces with two different RPS options, it enables Argagarg to play two divergent playstyles as the situation calls.
As Bubble Shield, you threaten any strong attacks with an accelerated clock and totally safe advantage time. A Bubble Shield that lasts three turns gives Argagarg’s innate the same damage as Grave landing his single ace attack once. In addition, you can play aggressively with impunity, as all of your opponent’s options will have their damage prevented; this forces the opponent to use extremely strong combat cards simply to be able to deal damage through combat again! However, your main goal is to sustain the Bubble Shield - if you suspect the opponent will use a fast attack in order to stop your aggression, you can simply dodge into a card of your choice; this serves the triple purpose of keeping the Bubble Shield active, dealing damage, and removing an opponent’s strong option.
As Blowfish Spikes, you have access to Argagarg’s fastest and most damaging attack. In the vast majority of matchups, it either beats or trades favorably with every opposing attack, while still having access to the other end of the ace in case the opponent has access to a 0.0 or a Gold Burst. Landing Blowfish Spikes even once accelerates your opponent’s clock by eight turns, making this quite threatening indeed and potentially game-winning when the opponent’s life total is low. Additionally, unlike Q, AA is actually a good choice to combo into, since you can get the Aces back by powering up. Having this threat in addition to Bubble Shield forces your opponent to respect all of your major combat options:
- If they don’t play around Bubble Shield and simply use their strong attacks or combo openers, they might end up in an extremely poor position because of how powerful Bubble Shield is.
- If they try to play around Bubble Shield by using their throws (which are usually faster than yours), they can get poked out by AA to lose their fast throw and take 18 damage after Hex.
- If they try to play around both sides of the Ace at once by blocking or dodging, your “slow” throws will win combat anyway for almost as much damage after Hex as AA!
Putting your opponent in a position where they have to respect all of your combat options is your second-most important goal as Argagarg, and the primary way to survive into his endgame.
Being Like Water: Argagarg’s Playstyles
Your main goal as Argagarg is to force your opponent into an endgame where Hex of Murkwood threatens to kill the opponent for you. As you can probably guess, this is very hard to do when you try to block for 35 to 50 turns against intelligent thinking humans; as a result, you need to turn cards into damage to get to critical life totals.
To effectively convert damage, consider the opponent’s counterplay to Argagarg’s deck:
- Bubble Shield is hideously strong
- Argagarg’s Hex of Murkwood does not work when he is knocked down
- When knocked down, Argagarg has one even block he is happy to use (6); all of his other “good” blocks are odd
- Argagarg has x.8 throws, which get dominated by almost everyone else
This means the opponent’s likely strongest option is to throw Argagarg until he forces them to stop. This makes your most reliable form of damage conversion (and overall best combat option) attacking, which fits perfectly anyway as Argagarg generally has efficient and quick attacks at every stage of the game. How you use Argagarg’s attacks in relation to his other options depends on the opponent and the cards you have available, and this provides him with two quite different playstyles.
The Flowing River – Attacks Protecting Blocks and Dodges
This is the most natural playstyle that Argagarg has. Even with Argagarg’s strong attacks, there is usually some strong attacking option the opponent has that is significantly faster than Argagarg’s non-Ace options. This is where Bubble Shield is strong; it allows you to turn your opponent’s dominant attack into a dominating gamestate for Argagarg. Your attacks form a synergistic defensive range, poking out throw attempts made in an effort to prevent Bubble Shield or to knock Argagarg down. Without Bubble Shield access, you can either dodge into a face card, dodge into a throw, or block to gain access to power-up resources for Aces. Even when playing defensively, blocking for the sake of cards is usually a mistake since you do not benefit tremendously from a large hand.
The Crashing Wave – Throws Protecting Attacks
This playstyle is allowed to exist because of the strength of Bubble Shield. Since Bubble Shield makes attempting to undercut Argagarg’s attacks extremely risky, this makes opponents more likely to block (to get stronger combat options) or dodge (into some sort of knockdown or high damage). This opens up Argagarg’s throws to convert more of his hand into damage and potentially accelerate into endgames even faster than the opponent expects, while simultaneously preventing the opponent from gaining strong combat options. This creates a synergistic offensive range, with Argagarg’s attacks catching counterthrow attempts to punish Argagarg’s generally slow throws while sometimes catching slower attacking options.
Notice that the two playstyles themselves protect each other – the first option could not exist if the opponent could simply block their way through your damage and destroy Argagarg once he is no longer a threat, and the second could not exist if Bubble Shield did not scare off fast attacks.
Finishing the Job – The Endgame
These two playstyles flow into each other in an effort to get Argagarg to an endgame. Once the opponent is below around 30 HP, all of your options become extraordinarily deadly, but your Ace goes from merely “important” to “vital to your existence”.
Bubble Shield speeds up your opponent’s clock in a way that would make Geiger blush. An opponent at even 20 HP has five turns to get rid of the shield before just immediately dying. Adding an extra cushion to your lifetotal is also ridiculously strong, as this puts more emphasis on knocking Argagarg down repeatedly if the opponent somehow manage to peel the shield off – they likely had to use significant speed/damage advantage to remove the shield in the first place.
Blowfish Spikes is usually worth well over half of your opponent’s remaining life total or will blatantly kill them in one shot. It also outspeeds almost every attack in the game and severely punishes opposing throw attempts meant to catch your Bubble Shield. Threatening Bubble Shield while actually “only” killing the opponent with Blowfish Spikes is a brutally effective way to navigate the endgame. Access to a Joker makes this option even stronger, since you can simply play it and facedown whatever high-damage play they have if they decide to dodge.
As Hex of Murkwood can easily kill the opponent in lategames on its own, “don’t die” is generally a sufficient win condition once you get the opponent to single-digit life. Dying makes your goal of grinding your opponent down significantly harder to achieve and should be avoided if at all possible.
Given the nature of Hex of Murkwood and the speed of Blowfish Spikes, this opens up several possibilities of checkmating the opponent in the endgame. Two samples follow: look out for these and try to figure out some on your own!
The elementary: Opponent is knocked down, has 2 HP (or less) and no special blocks. Gold Burst is checkmate. With a Bubble Shield attached, this scenario works from 4 HP or less.
Opponent is knocked down, has 4 HP (or less) and no jokers, special blocks, or attacks faster than 0.2 available – or you would survive trading with the opponent’s 0.2 speed attack. Blowfish Spikes is checkmate.
When playing Argagarg, the most important thing to remember is to keep your strategies varied. The wise words of Sun Tzu are applicable here.
“All men can see the tactics whereby I conquer, but what none can see is the strategy out of which victory is evolved. Do not repeat the tactics which have gained you one victory, but let your methods be regulated by the infinite variety of circumstances. Military tactics are like unto water; for water in its natural course runs away from high places and hastens downwards. So in war, the way is to avoid what is strong and to strike at what is weak. Water shapes its course according to the nature of the ground over which it flows; the soldier works out his victory in relation to the foe whom he is facing. Therefore, just as water retains no constant shape, so in warfare there are no constant conditions.” --Sun Tzu
This guide was written by @MadKing